Monday 24 October 2016

Pattern Hack - Tadah Patterns Jaunty Dress, Slim Fit Tee or Dolman Combo

Hello everyone!! I've been super quiet lately - life has been a little hectic!! But I thought I'd give you all a little pattern hack for the newly released Jaunty Dress and Slim Fit Tee to personalise it a little. I've also used this method to splice the bodice on the Dolman Combo Tee
Adding panels to the bodice or skirt on your dress or tee is quite simple and very effective, all you need is your imagination and some tracing paper or tracing fabric. 
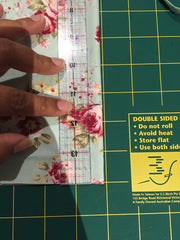
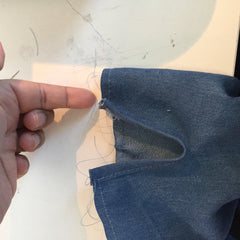
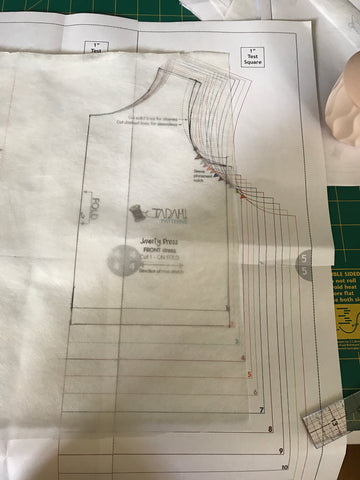
To start with trace your whole bodice in the size you need. To do this you'll need to trace on the fold (pic 1), flip the tracing, line up your fold line and trace the other side (pic 2) that way you have your whole bodice flat. 
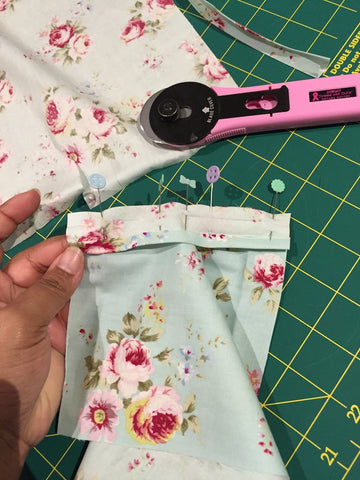
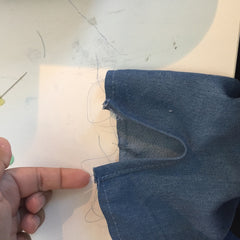
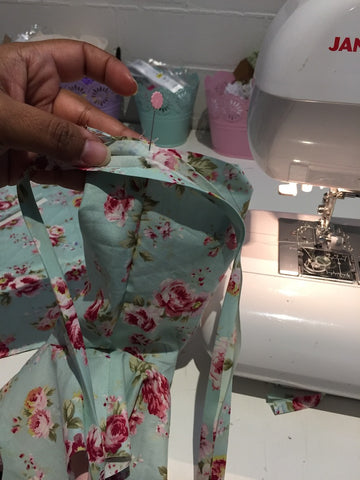
Then draw on the lines of the panelling you'd like to add to the bodice, see my example below. Here is a good time to think about how you'd sew the panels together - some pieces will need to go first, just like a puzzle. You can see below my bottom two angled pieces need to get sewn together first, then the bottom right, then those pieces will have a nice straight line to attach to the top.
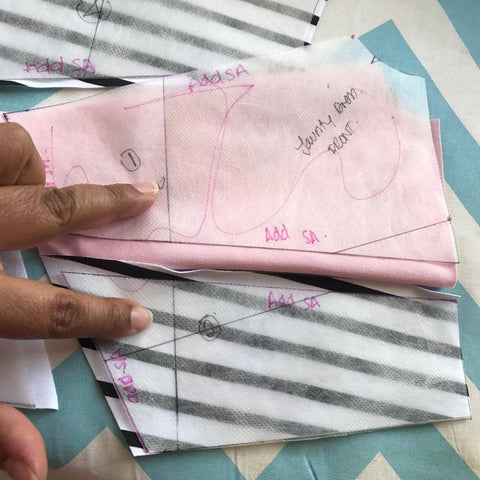
Next cut up your tracing along the 'panelled' lines. These will be your bodice pieces that you'll cut against. I highly recommend numbering your pieces in the order they get sewn together so you don't sew them together in the wrong order -  trust me on this partokay?
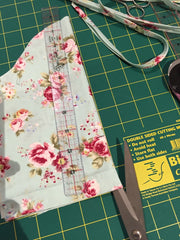
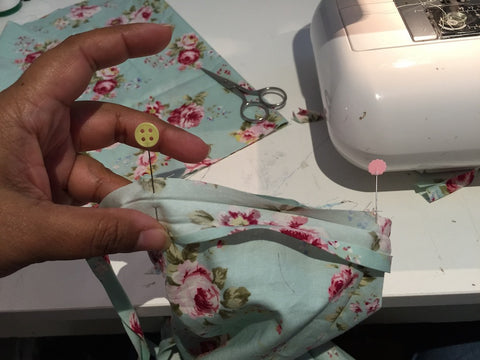
Also write on the tracing which lines you need to add your seam allowance to - you don't need to add to the outside of the bodice, just the lines you chopped up the bodice on, does that make sense? Hopefully the photo below will clear that up.
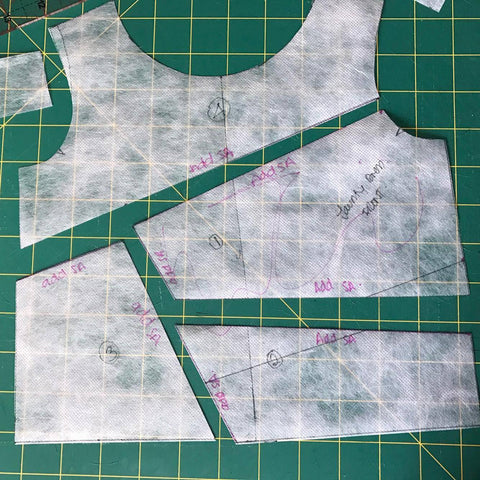
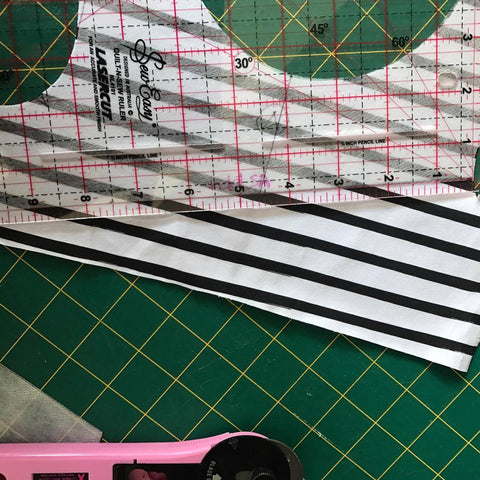
You can either a) re-trace these pieces and add your seam allowance to the new tracing or b) cut directly off these template pieces and add your seam allowance with a ruler while cutting (example in photo below) I find keeping the patterns seam allowance of 1/4" is the best and least confusing way to go.
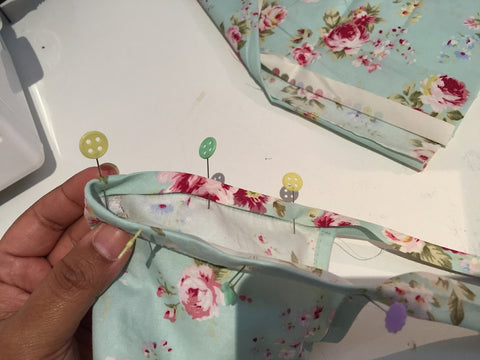
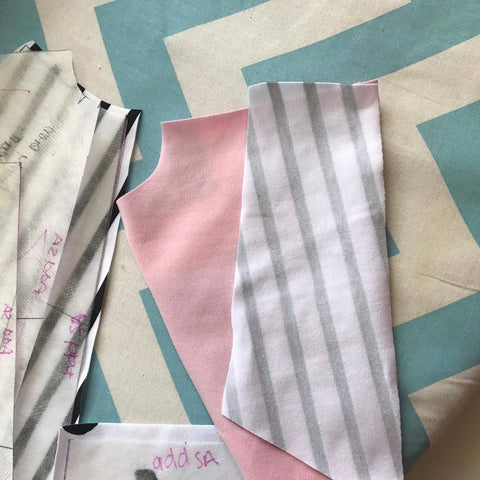
So your panelled bodice should now roughly resemble a bodice.
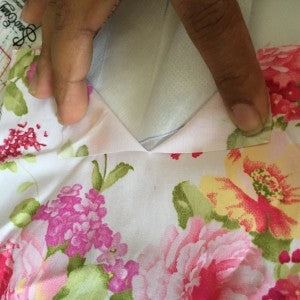
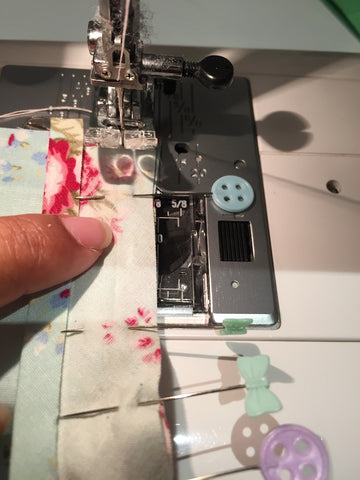
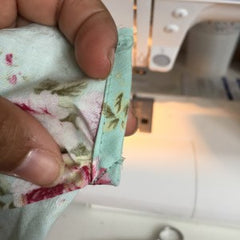
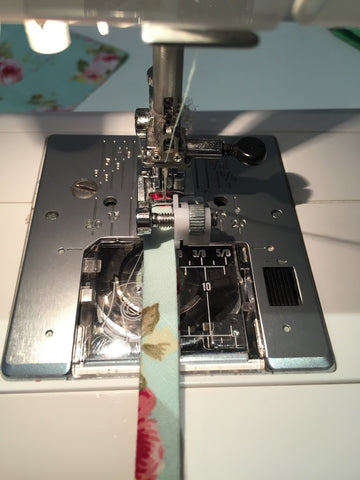
Once you've cut your bodice pieces from the panelled template, you will then need to sew them together using the 1/4" seam allowance and press the seam allowance to one side.
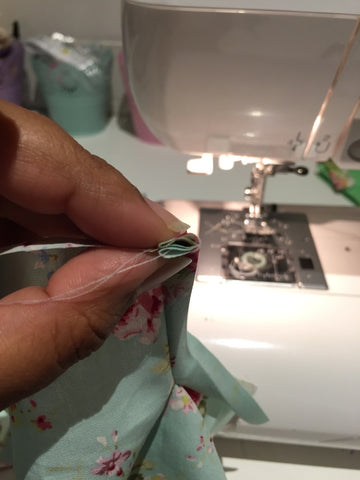
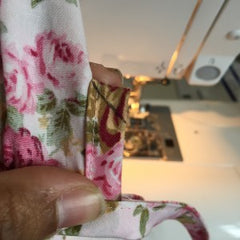
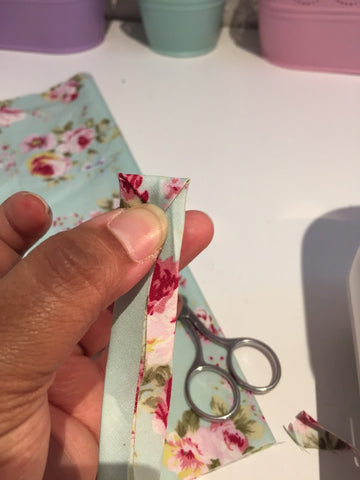
Once you've sewn all the pieces together to form the bodice, clip off any little corners. IF you'd like to top stitch down your seam allowance, then do this now. 
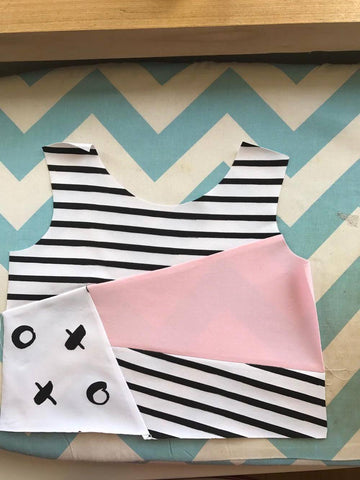
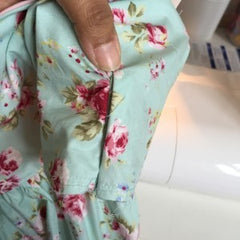
And your panelled bodice is done!!
Finish your dress/tee as per the pattern 
Happy Sewing 
T x
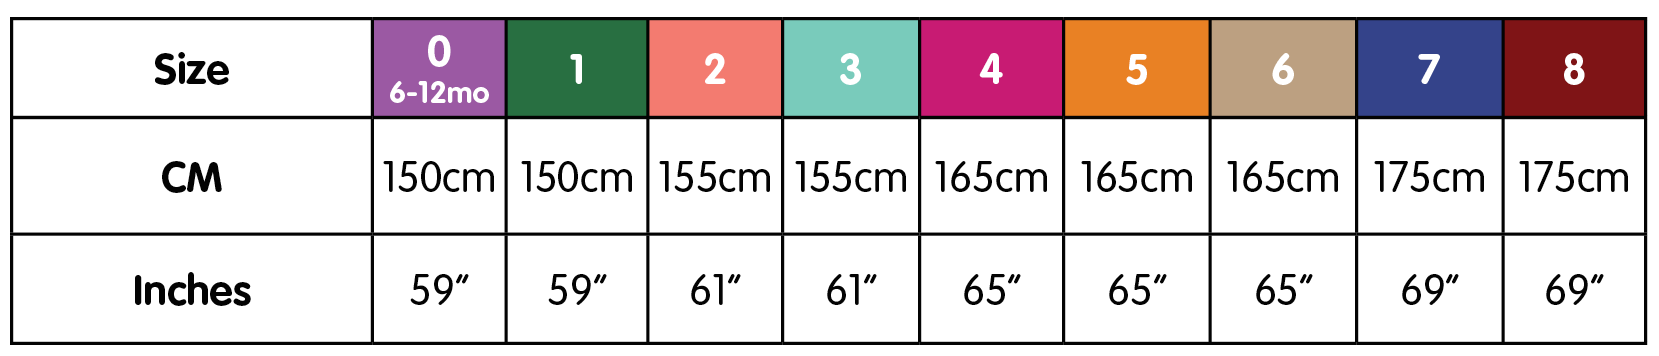
 Pattern Used: Jaunty Dress with single circle skirt option
Pattern used: Dolman Combo

Thursday 23 June 2016

Pattern Testing - Striped Swallow Designs - Misdummers Dream

I haven't been this excited by a pattern since the Tea Party Dress! 


Think dreamy, summer, elegant perfection....


There's options for a dress with a nice twirly skirt or the option to make it as separates - crop top and skirt. You can add straps or have it completely strapless - might I suggest straps for the under 3 age group, there'll be flashing otherwise haha! I found this out the hard way and then had to retro-add straps 


It's a super quick sew with a beautiful finish and result 

My girls are pretty in love with their dresses. I've also made a maxi length but being in the middle of an Australian winter has meant not many days to photograph it, unfortunately. 

Happy sewing 
T xx

Friday 3 June 2016

Pattern Hack - Tadah Tea Party Long Sleeve with Ties

Hi All :-)
Hope you're all happily sewing up your long sleeves for winter!! We've been having such a mixed up winter in Sydney - one day we have beautiful sunshine, the next arctic winds!
I will admit up front, so we're all clear - this hack is fiddly... but the results are totally worth the extra work, I promise!
What you'll need:
Tea Party Dress patternTea Party Long Sleeve Add onBias - pre-made or make your own - I'll link you up with a fabulous Youtube tutorial on how to cut continuos strips of bias from a rectangle. But first, here is the amount of bias you will need - you can make them in separate amounts rather than one large strip, the amounts below are the total amount needed. To break it down you'll need roughly 5.5" per placket and the balance can be halved for the ties.
If you're making your own bias cut 1.5" wide strips.
Tea Party Sleeves measurement table 1
If you're making long sleeves, remove the 3/4" hem allowance from the wrist of the sleeve. I used the 3/4 sleeve measurement from the straight sleeve to make 3/4 gathered sleeves - this hack will work for the 3/4, short gathered and long sleeve, you may have a bit of left over bias though.
Fold your sleeve in half and make a 2.5" slit down the middle, repeat for other sleeve. This slit will be your placket.
Tea Party tie sleeve 1    Tea Party tie sleeves 2    Tea Party tie sleeves 3

Pull the tip of each slit out to the sides so the placket sits flat, this is where you will be pinning your bias to create a bound placket.
Tea Party tie sleeves 4

Unfold your bias and pin along your placket, right sides together, raw edges matching. Sew in the first fold. 
Tea Party tie sleeves 5   Tea Party tie sleeves 6

Fold it over and tuck all the bias under and sew it down from the top, go slow to make sure you catch all the bias underneath. You can use Sewline glue to help hold it down.
Tea Party tie sleeves 7

With your sleeve inside out, fold your new placket so that it is completely even, the raw edges of your sleeve should be lined up. You will sew a diagonal line from the top of the placket - see the picture where I've drawn a line (ignore the fact that my ties are already done, this bit was an afterthought). This step will allow your placket to sit flat afterward (like pic 3, below).
Tea Party tie sleeves 8    Tea Party tie sleeves 9   Tea Party tie sleeves 10

Treat your sleeve as per pattern now, except don't fold up the sleeve hem.
So, follow steps 1, not 2, 3-14 for the tricky method OR steps 1 - 2, not 3, 4-7 for the quick method.
Ignore step 15
Instead, run a gather stitch from one end of the placket, around the raw edge the sleeve hem, to the other placket. Gather to roughly the lengths below, leaving a 3/8" gap at the ends the placket - so do not gather the actual placket portion.
Tea Party sleeves measurement table 2
Tea Party tie sleeves 11    Tea Party tie sleeves 12

Cut the remaining bias strip in half and find the centre of each strip.
Line up the centre of the bias strip, with the centre of the under arm seam and pin - we're attaching the exact same way as the placket.
Tea Party tie sleeves 13   Tea Party tie sleeves 14

Start sewing in the first fold at the beginning of the placket, sew around to the other end of the placket - NOT the end of the bias strip, just around the sleeve hem at this stage.
Again, fold over the bias and pin the whole strip.
Tea Party tie sleeves 15

I like to miter my ends, but it's up to you how you enclose it.
Tea Party tie sleeves 16

Start from the end of the bias strip and sew approx 1/8" from the edge. Go slow and make sure you're catching all the bias on the other side - again, sewline glue is helpful to keep it all together.
Tea Party tie sleeves 17

Repeat for the other sleeve and then see section 3 on how to finish your skirt pieces.
Tadah!!!!
I had some fabulous ladies help me along the way with advice and testing the lengths of the ties. Rachel from Bubbles & Butterflies and Martina from Noble Cubs, thank you both so much. Also a huge thank you to Alana from @itsbettyjaneadventures for the stunning pic of her gorgeous Betty in one of my dresses <3


Saturday 9 April 2016

Pattern Testing - Baby Tea Party Dress - Tadah Patterns

I'm fairly certain I don't need to say anything about this pattern to make you want to buy it.... The photos alone should do it haha


But ok, ok, I'll write stuff...

So it's slightly different to the kid sized Tea Party pattern in that it doesn't have my favourite back option - the scoop - however when you think about it logically that back isn't going to work for a baby who spend a lot of time laying down.  The new Kiss Back option though I think is possibly my new favourite - I'll admit when I first saw it, I was like "meh, it's still not the scoop back" and then I saw a few testers make it and I had all the heart eyes for it! Then I made one for my littlest miss and IT WAS LOVE!! 

So the low down - 3 neckline options, 3 back options, skirt, playsuit, romper and the option to layer these so you can have an all in one playsuit or romper with a skirt over the top - genius!!! So perfect for my dress only wearing 1yo who likes to flash her nappy to strangers in the street! Yes, yes she does....

If you've got kids, like mine, who are mashed width/height sizes can I suggest you don't size up in the playsuit or the romper width, they're a bubble fit so they're roomy enough already. 

Ok, enough talk ... Onto those photos! I'm not loving my photos this time - I hurt my foot and am in a cam boot for a few weeks so driving to pretty locations was out, so I had to take photos in my own backyard- which isn't anything special at all. Anyway, I said I was done talking two sentences ago...


Friday 19 February 2016

Pattern Hack - Tadah Patterns Tea Party dress with a zip


Zippity dodah!!

I've finally finished my zip hack for the tea party dress!! 

You can find it here on the Tadah Patterns blog 

Happy sewing 
T xx


Friday 15 January 2016

Pattern Test - Dolman Dress (Tadah Patterns)


The other pattern test I was recently involved in was the Dolman Combo from Tadah Patterns. 

For me this little dress is a no brainer - it ticks the kindy boxes of shoulders covered while also ticking my sewing necessities of quick, comfortable and cute. AND perhaps, most importantly it ticks my 3 year olds clothing requirements of "I only wear dresses" and being knit, it's comfortable for her to race around and play in. 

It comes in a huge size range of NB to 14!! In true Tadah tradition there are options galore - a crop top, t-shirt and dress length and also a long sleeve option, you can also bind the arm/neck holes or use a cuff, there is also the option for you to use a woven panel in the top front - you can use up those off cuts! 

I went over to a friends place, who was also testing the pattern and we sewed together for our little misses - surprisingly, after a lot of time spent chatting and taping the pattern together the actual sewing was insanely quick!  

We later took them to the beach for an elaborate photoshoot we'd planned, however as soon as they spotted water any chance we had of a photoshoot went out the window - I managed a couple of shots before they were both soaked!! 

(T-shirt version made by Tash from Ellie's Handmade) 
I've just finished making her another for her first day of preschool - I used a hideous (to me) My Little Pony print that she is going to totally LOVE
I hope having a dress she loves will ease her nerves on her first day at preschool- I can hope, right? 

I've only just reminded myself (while typing this post) of the size range in this pattern and that I really should make my littlest one for day care, so I might leave you here and go make one :)

Happy sewing 
T xx